UGC Techdocs
  • Introduction
  • Guides
    • Analytics
      • Tracking UGC on Adobe Analytics
      • Tracking Widget interactions with Google Analytics
    • Direct Uploader
      • How to add Custom Data to Direct Uploader
      • How to capture Custom Data on Direct Uploader
      • How to automatically tag data on Direct Uploader
      • How to Customize error messages on Direct Uploader
      • How to Track Direct Uploader form submissions with Google Analytics (Universal & GA 4)
    • Data Templates
      • Creating a Data Template
    • Rights via Registration
      • Capture Custom Data on Rights by Registration Form
      • Styling Rights via Registration Form
    • REST API
      • Caching REST API results for optimization
      • Posting content into Nosto via Tile API
      • Posting images into Nosto via Tile API
    • Onsite Widgets (2.0)
      • Blank Canvas
        • How to Use the Blank Canvas to Create a Twitter Count Widget
        • Creating an Auto-Scrolling Carousel using Blank Canvas
        • Creating Gallery Widget by Using the Blank Canvas Widget
        • Creating a simple Hover effect using Blank Canvas
        • Creating a Word Cloud using Blank Canvas
        • Creating Your Widget by Using the Blank Canvas
      • Bind your own Events
      • Creating a Grid Widget from Waterfall
      • Create a Q&A Widget using Data Templates
      • Displaying a Widget in a Mobile App
      • Dynamically Specify Products to Display in Widget
      • Dynamically specify what Tile to display in a Widget
      • How to add a title / subtitle to a widget
      • How to localize the load more button on widgets
      • How to overlay existing Google Map with the UGC Map Widget
      • How to use Filter and search in a Widget
      • How to change click on inline tile behaviour to redirect to PDP in a Widget
      • Styling cross-sellers on Grid and Carousel Widgets
      • How to Load External JS and CSS into Widgets
      • Profiling Widget Performance
      • Re-targeting with Widgets and Facebook Pixel
      • Render Widget filters dynamically
      • Styling Carousel Widget
      • Styling Grid Widget
      • Styling Masonry Widget
      • Styling Waterfall Widget
      • Styling Widget Expanded Tile
      • Styling Widget Shopspots
      • Using Web Fonts in Widgets
    • Digital Screens
      • Customizing Carousel Event Screen
      • Customizing Mosaic Event Screen
      • Customizing Scrollwall Event Screen
      • Customizing the Mosaic Event Screen to Have 9 Even Tiles
    • Email
      • Adding Location to an Email Tile
      • Styling the Email Widget
    • Integrations
      • DoubleClick
        • UGC Ads with Nosto and Google DoubleClick
      • Zapier
        • Consuming UGC Webhooks via Zapier
      • Mailchimp
        • Bring Social Content into a Mailchimp Campaign
    • Webhooks
      • Trigger notifications when content is in the moderation queue
  • Widgets
  • API Docs
    • JavaScript API
      • Widgets
        • Introduction
        • API Reference for Content Widgets
        • API Reference for Blank Canvas
        • API Reference for Map Widget
      • Digital Screens
        • Introduction
        • API Reference
    • Content API
      • Reference
    • REST API
      • Reference
        • Filters API
        • Moderation Views API
        • Tags API
        • Terms API
        • Tiles API
        • Users API
        • Widgets API
        • Automation Rules API
        • REST API Reference Widgets style and config
      • Best Practices
    • Webhooks
  • Enterprise Tools
    • Automation Rules
      • Triggers
      • Actions
      • Samples
    • Data Templates
    • User Access Control (UAC)
    • Single Sign On (SSO)
    • Enterprise Admin User Interface (EAUI)
    • Zapier
  • Commerce Tools
    • Product Feeds
    • Widget Implementation
    • Reporting
    • Integrations
      • Google Tag Manager
      • Magento
      • SalesForce Commerce Cloud
      • Shopify
      • Shopify Add To Cart
        • Global Variant Mapping for Add to Cart
        • Customise Add to Cart Widget Experience
  • Analytics
    • Google Analytics 4
      • Getting Started
      • Widgets Events
      • E-commerce Events
      • Email Events
  • Terms of Use
Powered by GitBook
On this page
  • Overview
  • Step 1 - Settings
  • Step 2 - Coding for Layout and Tile Templates
  • Sample Code
  • Step 3 - Coding for CSS
  • Sample Code
  • Step 4 - Coding for JavaScript
  • Step 5 - Refinement
  • Sample Code
  • Result - The Gallery Widget
  • Live Demo!

Was this helpful?

  1. Guides
  2. Onsite Widgets (2.0)
  3. Blank Canvas

Creating Gallery Widget by Using the Blank Canvas Widget

PreviousCreating an Auto-Scrolling Carousel using Blank CanvasNextCreating a simple Hover effect using Blank Canvas

Was this helpful?

Overview

If you need a widget that Nosto's UGC hasn't supplied out of the box yet, Blank Canvas allows you to create your widget from scratch. In this guide, we will show you how to create a Gallery widget with Blank Canvas step by step. You can learn more information about the Blank Canvas Widget in the following guide: .

Step 1 - Settings

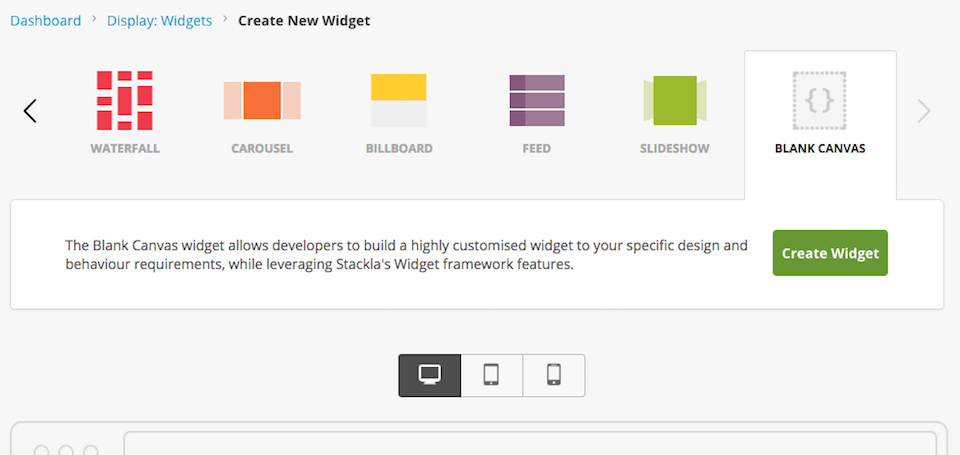
If the widget is enabled in your stack, you will see the extra widget type, Blank Canvas, appear in your Widget creation page.

Just click the Create Widget button to start.
Before you start getting creative with the Blank Canvas you will need to set it up properly to ensure that it all works.

The Selected Filter is the most important setting among them as it involved the data that you can fetch from Stackla.

Step 2 - Coding for Layout and Tile Templates

Sample Code

Layout


<div class="track">
    <div class="container" id="gallery">
        {{#tiles}}
            {{>tpl-tile}}
        {{/tiles}}
        <div class="clear"></div>
    </div>
</div>

Tile

The following Tile template will be included by the {{>tpl-tile}} syntax above. We will use classnames .g-tile, .g-caption, .g-photo, .g-img to style with CSS in the next section.


<div class="g-tile">
    <div class="g-caption">
        {{#emoji}}{{{message}}}{{/emoji}}
    </div>
    {{#image}}
    <div class="g-photo">
        <img src="{{image}}" class="g-img" height="360"/>
    </div>
    {{/image}}
</div>

To preview the result of HTML template, we need to get data using JavaScript. Click on the fork button on the JavaScript panel, you will get the minimal code needed.


Stackla.loadTilesByFilter(function (tiles) {
    // Render the layout template
    Stackla.render({tiles: tiles});
});

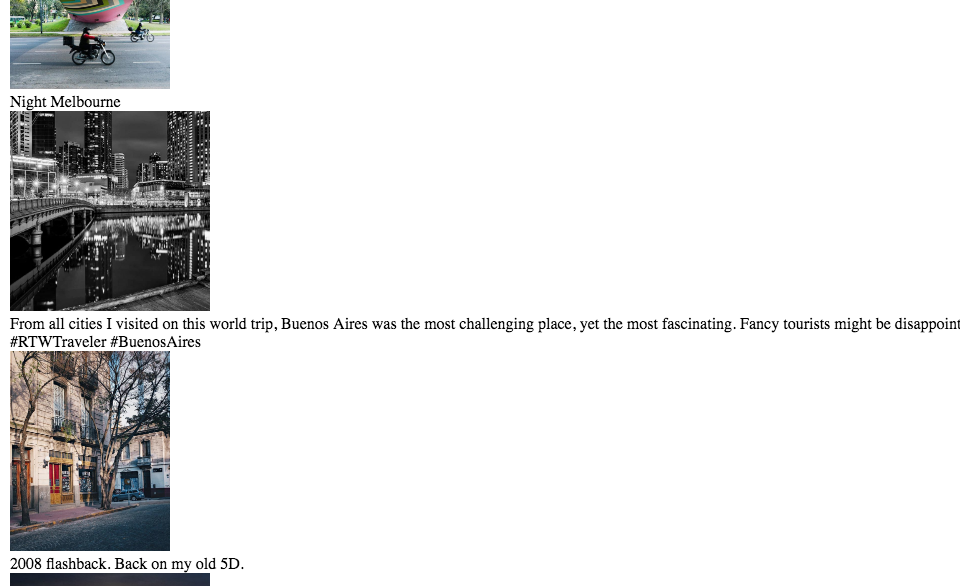
Click on the button "Update Preview", you should see plain stacked images and captions.
Step 3 - Coding for CSS

All of the CSS rules reside within the iframe, so you don't need to worry about any conflicts with your page. Please make use of the @import directive to import the external CSS stylesheets you need.

Sample Code


@import url(https://fonts.googleapis.com/css?family=Open+Sans+Condensed:300|Rajdhani);

body {
  font-family: 'Open Sans Condensed', sans-serif;
}

.g-tile {
    position:relative;
    float:left;
    height: 360px;
    overflow: hidden;
    background: #eee;
}
.g-tile .emoji {
    height: 1em;
}
.g-img {
    height: 360px;
}
.g-caption {
    position:absolute;
    left: 0;
    right:0;
    bottom:0;
    background: rgba(0,0,0,0.5);
    color: #fff;
    padding: 15px;
    line-height: 1.5;
    display:none;
}
.g-tile:hover .g-caption {
    display:block;
}
.clear {
    clear: both;
}
    

Click on button "Update Preview", you should see images aligned in rows.

Step 4 - Coding for JavaScript

By applying Freewall plugin to our widget's container(#gallery), we will get a gallery layout. Please note that the cellH (360) is the same as height property in CSS.


Stackla.loadJS([
    'https://cdnjs.cloudflare.com/ajax/libs/freewall/1.0.5/freewall.min.js',
    'https://unpkg.com/imagesloaded@4.1/imagesloaded.pkgd.min.js'
]).then(function(){
    // Load tiles data from selected filter
    Stackla.loadTilesByFilter(function (tiles) {

    // Render the layout template
    Stackla.render({tiles: tiles});
        var wall = new Freewall("#gallery");
        wall.reset({
            selector: '.g-tile',
            cellW: 30,
            cellH: 30,
            gutterX : 10,
            gutterY : 10,
            cacheSize : false,
            onResize: function() {
                wall.fitWidth();
            }
        });

        // images have loaded
        $('#gallery').imagesLoaded().done(function() {
            wall.fitWidth();

            var height = $('#gallery').height();
            // set ifrmae height
            Stackla.postMessage('resize', {height: height+'px'});

            // for scroll bar appear;
            $(window).trigger("resize");
        });
    });
});

Click on the button "Update Preview", you should see now tiles have filled all spaces of each row, but not images. We will fix it on the next step.

Step 5 - Refinement

We want images to fill each tile as well. So we set images to a background, and make it fill by CSS (background-size: cover). The tag remains but hidden to let Freewall calculate layout by images width.

Sample Code


<div class="g-tile">
    <div class="g-caption">
        {{#emoji}}{{{message}}}{{/emoji}}
    </div>
    {{#image}}
    <div class="g-photo"
         style="background-image: url({{image}})">
        <img src="{{image}}" class="g-img"/>
    </div>
    {{/image}}
</div>

@import url(https://fonts.googleapis.com/css?family=Open+Sans+Condensed:300|Rajdhani);

body {
  font-family: 'Open Sans Condensed', sans-serif;
}

.g-tile {
    position:relative;
    float:left;
    height: 360px;
    overflow: hidden;
}
.g-tile .emoji {
    height: 1em;
}
.g-img {
    height: 360px;
}
.g-photo {
    background-size: cover;
    background-repeat: no-repeat;
}
.g-photo img{
    visibility: hidden;
}
.g-caption {
    position:absolute;
    left: 0;
    right:0;
    bottom:0;
    background: rgba(0,0,0,0.5);
    color: #fff;
    padding: 15px;
    line-height: 1.5;
    display:none;
}
.g-tile:hover .g-caption {
    display:block;
}
.clear {
    clear: both;
}
    

Result - The Gallery Widget

That's it! Get your code and embed your Gallery Widget!!

Live Demo!

<script type="text/javascript">(function (d, id) { if (d.getElementById(id)) return; var t = d.createElement('script'); t.type = 'text/javascript'; t.src = '//assetscdn.stackla.com/media/js/widget/fluid-embed.js'; t.id = id; (document.getElementsByTagName('head')[0] || document.getElementsByTagName('body')[0]).appendChild(t); }(document, 'stackla-widget-js'));</script>

Now let's start writing some HTML. Blank Canvas introduces the template engine and the Mustache Partials feature. In the following example, we will use partial template tpl-tile to render tiles objects. The tiles objects must be prepared in the Custom JS Editor - which we will talk about later.

In the above sample code, we created a tile template that will display the image and caption with the id, emoji, message, and image properties. We have provided quite a few Tile properties so that you can assemble your own structure easily. Please check the for more details.

We want photos to fill each row's space, so we'll need some help from Javascript. We will use a library to help us do the job.

After applying all the Layout, Tile, CSS, and JS code by the above code, you should get a Gallery Widget .

Mustache
Freewall
(Live demo in JS Bin)
Creating Your Own Widget Type by Using the Blank Canvas Widget
Overview
Step 1 - Settings
Step 2 - Coding for Layout and Tile Templates
Step 3 - Coding for CSS
Step 4 - Coding for JavaScript
Step 5 - Refinement
Result - The Gallery Widget
Tile Properties section in the API documentation