Using Web Fonts in Widgets
You are reading the Classic Widget Documentation
Classic widgets are a previous widget version for onsite widgets created before September 23rd.
From September 23rd 2025, all new widgets created will be NextGen.
Please check your widget version on the Widget List page to see if it is Classic or NextGen widget.
You can read the Nextgen widget documentation here.
Overview
This article will instruct you on how to use web fonts from different providers such as Google, Typekit, Fonts.com or Fontdeck.
Step 1 - Load Fonts
You will need to download the font files before using them. Let's take a look at some different approaches to load fonts onto our web page.
Via the Custom CSS
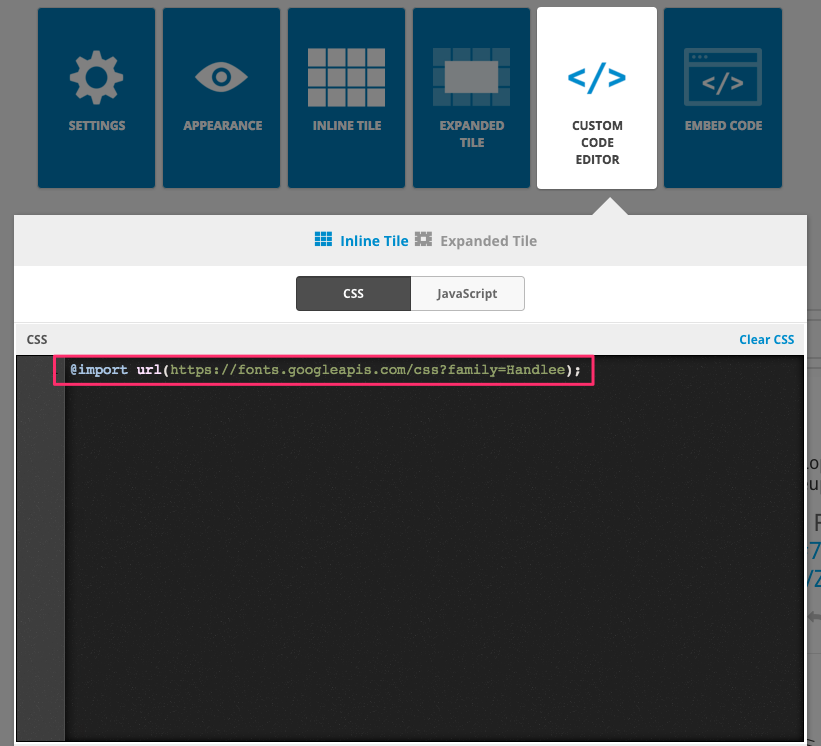
The easiest way to use Web Fonts is via the CSS @import statement. You can get the required CSS code from the mentioned providers and paste it into Nosto's UGC Custom CSS Code Editor.
Let's take a look at Google Fonts as an example. After you select the fonts you need, you can go to the Use page and get the required code from the @import tab.

Paste the code into the Nosto's UGC Custom CSS Editor.
Via the Custom JavaScript
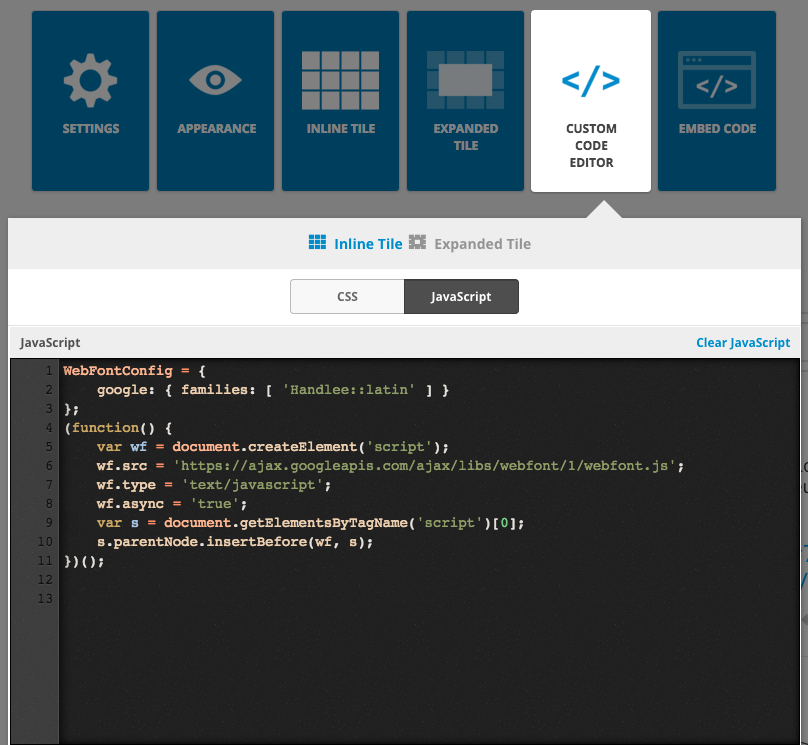
An alternative way to load font files is via Javascript. Let's take a look at Google Fonts as an example again.
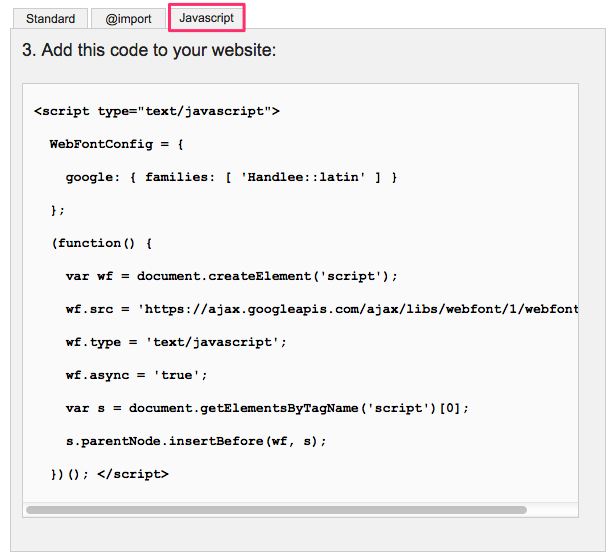
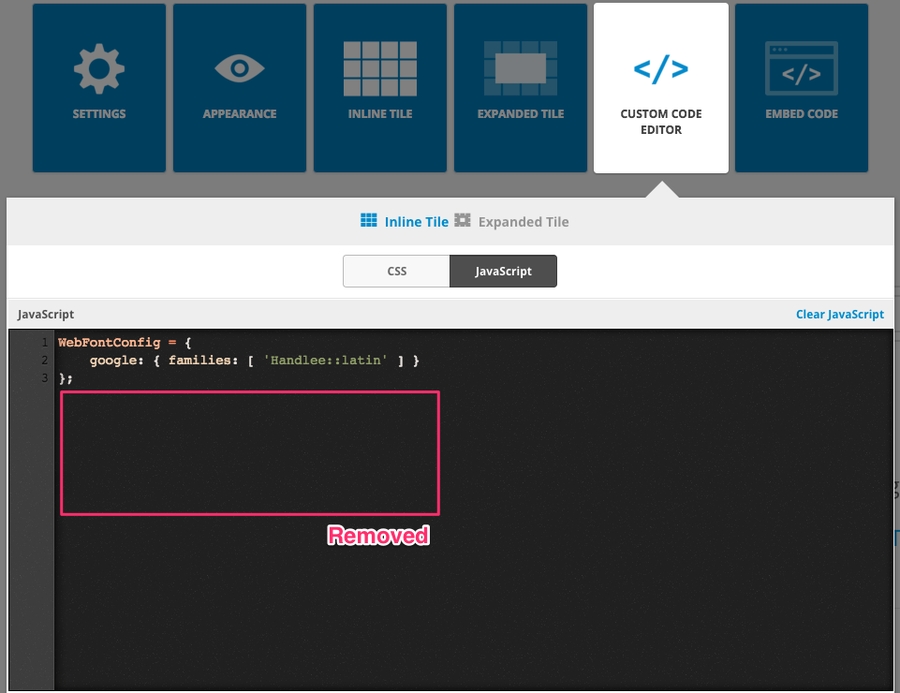
Paste the code into the Nosto's UGC Custom JavaScript Editor. Please note the <script/> tags must be removed.
Tips - Enabling Web Fonts
By enabling the Web Fonts option in Appearance tab, you just need to configure the WebFontConfig global variable without loading the Web Font Loader library manually.

Note the Web Fonts config option currently is only available in Waterfall, Carousel, and Vertical Fluid widgets. And it only affects the inline tiles, not the expanded tile.
What's the Differences?
You may wonder why we need the more complicated JavaScript method. This is because the Web Font Loader gives us additional control. The following code snippet illustrates minimizing the flash of styled text by setting sessionStorage.
For more information, check the official Web Font Loader repository. We also recommend you to read the Loading Web Fonts with the Web Font Loader article on the CSS-Tricks website.
Step 2 - Use Fonts
After loading fonts properly, all you need to do is add the font name to your CSS styles. For example:
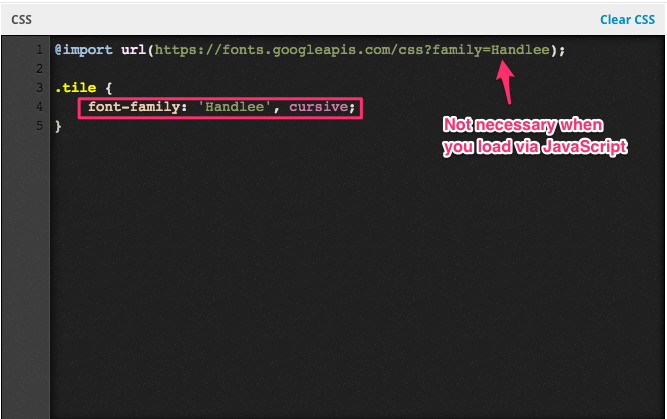
Sample
In the following example, we are going to use the Custom Javascript editor to load multiple web fonts from different font providers. Note that we have enabled the Web Fonts option in the Appearance tab. We have also enabled sessionStorage to avoid the flash issue.

Inline Tile Custom JavaScript
Here we specify how to use the "Open Sans Condensed" font from Google and a TypeKit kit containing the "Industry" font.
Note that TypeKit is a paid service, you need to register by yourself and use it on Nosto's UGC widgets.
Inline Tile Custom CSS
Expanded Tile Custom CSS
To demonstrate the Expanded Tile Custom CSS we've used the CSS @import method to load the "Open Sans Condensed" and "Rajdhani" fonts from Google Fonts.
Currenly we don't provide the Web Font Loader in the Expanded Tile. You can only load the Web Fonts from CSS @import.
Widget with Customised Web Fonts
Last updated