UGC Techdocs
  • Introduction
  • Guides
    • Analytics
      • Tracking UGC on Adobe Analytics
      • Tracking Widget interactions with Google Analytics
    • Direct Uploader
      • How to add Custom Data to Direct Uploader
      • How to capture Custom Data on Direct Uploader
      • How to automatically tag data on Direct Uploader
      • How to Customize error messages on Direct Uploader
      • How to Track Direct Uploader form submissions with Google Analytics (Universal & GA 4)
    • Data Templates
      • Creating a Data Template
    • Rights via Registration
      • Capture Custom Data on Rights by Registration Form
      • Styling Rights via Registration Form
    • REST API
      • Caching REST API results for optimization
      • Posting content into Nosto via Tile API
      • Posting images into Nosto via Tile API
    • Onsite Widgets (2.0)
      • Blank Canvas
        • How to Use the Blank Canvas to Create a Twitter Count Widget
        • Creating an Auto-Scrolling Carousel using Blank Canvas
        • Creating Gallery Widget by Using the Blank Canvas Widget
        • Creating a simple Hover effect using Blank Canvas
        • Creating a Word Cloud using Blank Canvas
        • Creating Your Widget by Using the Blank Canvas
      • Bind your own Events
      • Creating a Grid Widget from Waterfall
      • Create a Q&A Widget using Data Templates
      • Displaying a Widget in a Mobile App
      • Dynamically Specify Products to Display in Widget
      • Dynamically specify what Tile to display in a Widget
      • How to add a title / subtitle to a widget
      • How to localize the load more button on widgets
      • How to overlay existing Google Map with the UGC Map Widget
      • Styling cross-sellers on Grid and Carousel Widgets
      • How to Load External JS and CSS into Widgets
      • Profiling Widget Performance
      • Re-targeting with Widgets and Facebook Pixel
      • Render Widget filters dynamically
      • Styling Carousel Widget
      • Styling Grid Widget
      • Styling Masonry Widget
      • Styling Waterfall Widget
      • Styling Widget Expanded Tile
      • Styling Widget Shopspots
      • Using Web Fonts in Widgets
    • Digital Screens
      • Customizing Carousel Event Screen
      • Customizing Mosaic Event Screen
      • Customizing Scrollwall Event Screen
      • Customizing the Mosaic Event Screen to Have 9 Even Tiles
    • Email
      • Adding Location to an Email Tile
      • Styling the Email Widget
    • Integrations
      • DoubleClick
        • UGC Ads with Nosto and Google DoubleClick
      • Zapier
        • Consuming UGC Webhooks via Zapier
      • Mailchimp
        • Bring Social Content into a Mailchimp Campaign
    • Webhooks
      • Trigger notifications when content is in the moderation queue
  • Widgets
  • API Docs
    • JavaScript API
      • Widgets
        • Introduction
        • API Reference for Content Widgets
        • API Reference for Blank Canvas
        • API Reference for Map Widget
      • Digital Screens
        • Introduction
        • API Reference
    • Content API
      • Reference
    • REST API
      • Reference
        • Filters API
        • Moderation Views API
        • Tags API
        • Terms API
        • Tiles API
        • Users API
        • Widgets API
        • Automation Rules API
        • REST API Reference Widgets style and config
      • Best Practices
    • Webhooks
  • Enterprise Tools
    • Automation Rules
      • Triggers
      • Actions
      • Samples
    • Data Templates
    • User Access Control (UAC)
    • Single Sign On (SSO)
    • Enterprise Admin User Interface (EAUI)
    • Zapier
  • Commerce Tools
    • Product Feeds
    • Widget Implementation
    • Reporting
    • Integrations
      • Google Tag Manager
      • Magento
      • SalesForce Commerce Cloud
      • Shopify
      • Shopify Add To Cart
        • Global Variant Mapping for Add to Cart
        • Customise Add to Cart Widget Experience
  • Analytics
    • Google Analytics 4
      • Getting Started
      • Widgets Events
      • E-commerce Events
      • Email Events
  • Terms of Use
Powered by GitBook
On this page
  • Overview
  • Key Concepts
  • RSS
  • MailChimp
  • The Fun Part
  • Install and Configure the Nosto's UGC ‘Content Feed’ Plugin
  • Add RSS to your MailChimp Campaign

Was this helpful?

  1. Guides
  2. Integrations
  3. Mailchimp

Bring Social Content into a Mailchimp Campaign

Overview

In this guide, we explore the general concept of displaying User Generated Content that has been aggregated by Nosto's UGC into a standard MailChimp campaign.

This guide focuses on the simplest and most effective way of displaying the content by using an out-of-the-box MailChimp template.

Key Concepts

RSS

Rich Site Summary (RSS), often called Simple Syndication, uses a family of standard web feed formats to publish frequently updated information such as blog entries, news headlines, audio or video.

Nosto's UGC provides a feed of ingested social tiles in compliance with the RSS file format as part of its Content Feed Plugin.

MailChimp

MailChimp is a web-based email marketing service used by over 9 million people and businesses around the world to send email communications.

The Fun Part

In this guide we will do the following:

  • Install and configure the Nosto's UGC ‘Content Feed’ plugin

  • Add RSS content to a MailChimp template

Install and Configure the Nosto's UGC ‘Content Feed’ Plugin

Go to the Plugin directory within your Stack and install the plugin titled Content Feed - if Plugins are not available in your Stack and you wish to access them, please contact Nosto Support for more information.

Once set, you will be provided a feed URL, which will contain a series of parameters, these are:

  • Filter - Filter of Content

  • Type - RSS or ATOM

Select the Filter of the content you wish to add to your MailChimp campaign, and the output of RSS before hitting save.

Once saved the endpoint provided will be what you can use within your MailChimp template.

The structure of data within the Nosto's UGC RSS feed is outlined below:

<item>
            <title>Tile Comment</title>
            <link>Source Link</link>
            <description></description>
            <pubDate>Date Published</pubDate>
            <guid isPermaLink="false">GUID</guid>
                        <author>Author</author>
                        <enclosure url="Image URL" 
                        length="0" 
                        type="image/jpeg" />
</item>

Add RSS to your MailChimp Campaign

The first step is to build a new MailChimp campaign. For this guide we will be creating a 'Regular Campaign', however, the same principles can be used for 'A/B Testing Campaigns' and of course 'RSS Campaigns'
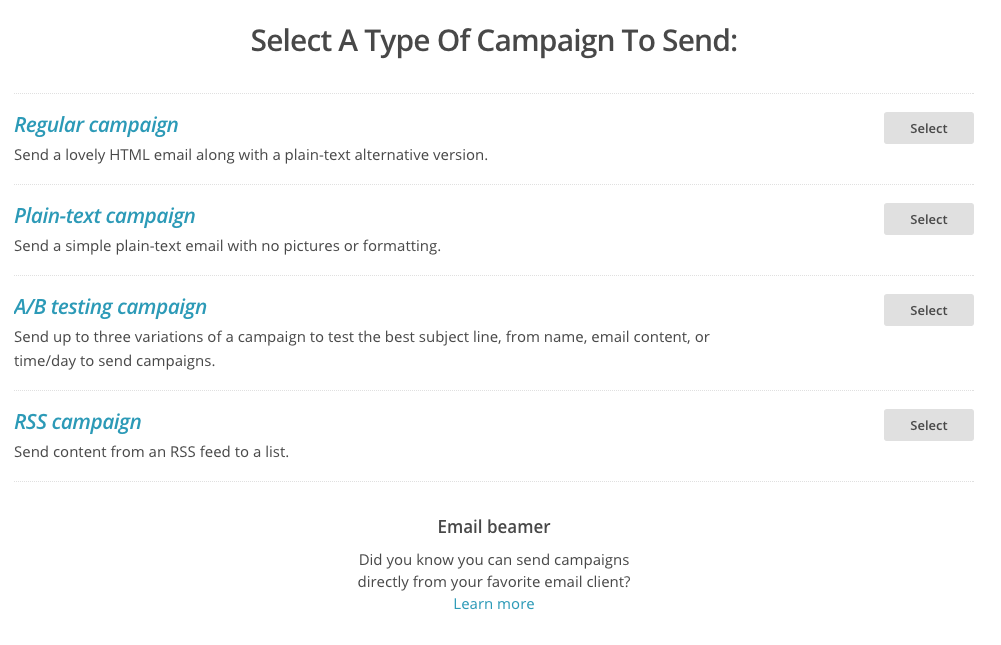
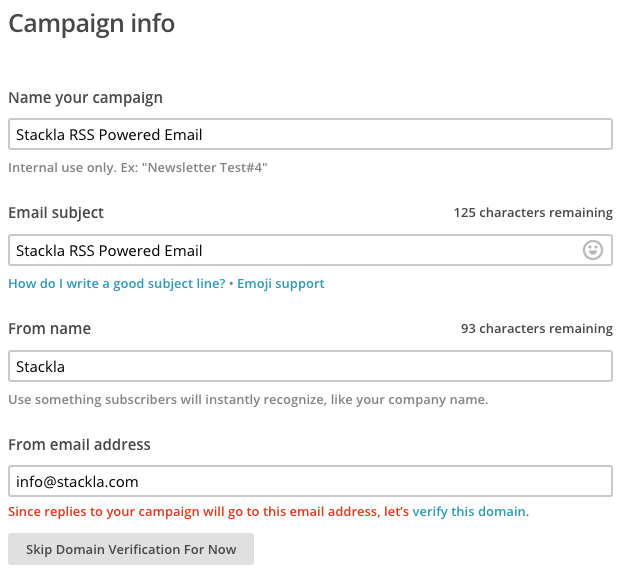
Once you have selected your campaign, select who you wish to send the email to, and fill out your campaign information.
You can now select a template or upload your HTML. For this guide, we are going to leverage the 'Simple Text' template within MailChimp
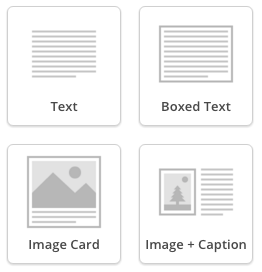
Once your Template has loaded up you can now start leveraging MailChimp's Template Editor to insert the RSS feed. It should be noted, that the four content modules RSS can be added into are Text, Boxed Text, Image Cards, and Image + Caption. For this demo, we are going to use Text.
Once the WYSIWYG editor has loaded up, look for the 'Source' Icon (indicated by the ) from the toolbox.

From here MailChimp allows you to insert a Feed Block which will allow you to specify the feed, how many items to show, and the other values you wish to display. The table below specifies what each line of code does and how it can be used.

MailChimp Tag
Description

*|FEEDITEM:URL|*

Display the URL to your social post on the source network. Relates to RSS tag <url>

*|FEEDITEMS:[$count=X]|*

Define where the individual RSS item starts and how many items you wish to display. Relates to RSS tag <item>

*|FEEDITEM:TITLE|*

Display the title for your social post. Relates to RSS tag <title>

*|FEEDITEM:ENCLOSURE_URL|*

Display the URL of any images in your social post. Relates to the RSS tag <enclosure>

*|FEEDITEM:DATE|*

Display the date for your social post. Relates to RSS tag <PubDate>

*|FEEDITEM:AUTHOR|*

Display the author of your social post. Relates to the RSS tag <author>

*|FEEDITEM:URL|*

Define where RSS feed starts and what feed you are bringing into your MailChimp Campaign. Relates to RSS tags <channel>

*|END:FEEDITEMS|*

Define where the feed item information ends

*|END:FEEDBLOCK|*

Define where the feed block ends

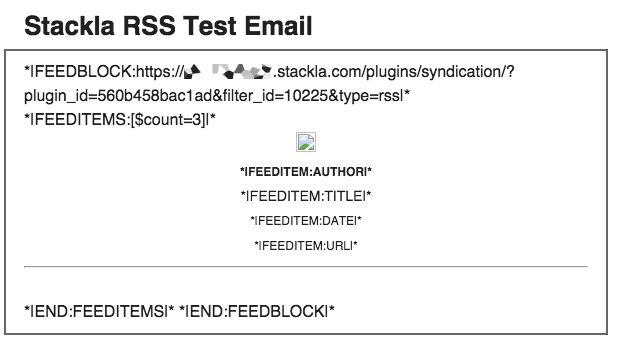
Using these MailChimp Tags, we inserted the below information for the demo:

*|FEEDBLOCK:https://client.stackla.com/plugins/syndication/?plugin_id=560b458bac1ad&filter_id=10225&type=rss|*<br />
*|FEEDITEMS:[$count=3]|*
<div style="text-align: center;"><img src="*|FEEDITEM:ENCLOSURE_URL|*" width="300" /><br />
<strong><span style="font-size:12px">*|FEEDITEM:AUTHOR|*</span></strong><br />
<span style="font-size:14px">*|FEEDITEM:TITLE|*</span><br />
<span style="font-size:12px">*|FEEDITEM:DATE|*</span><br />
<span style="font-size:12px">*|FEEDITEM:URL|*</span></div>

<hr /><br />
*|END:FEEDITEMS|* 
*|END:FEEDBLOCK|*

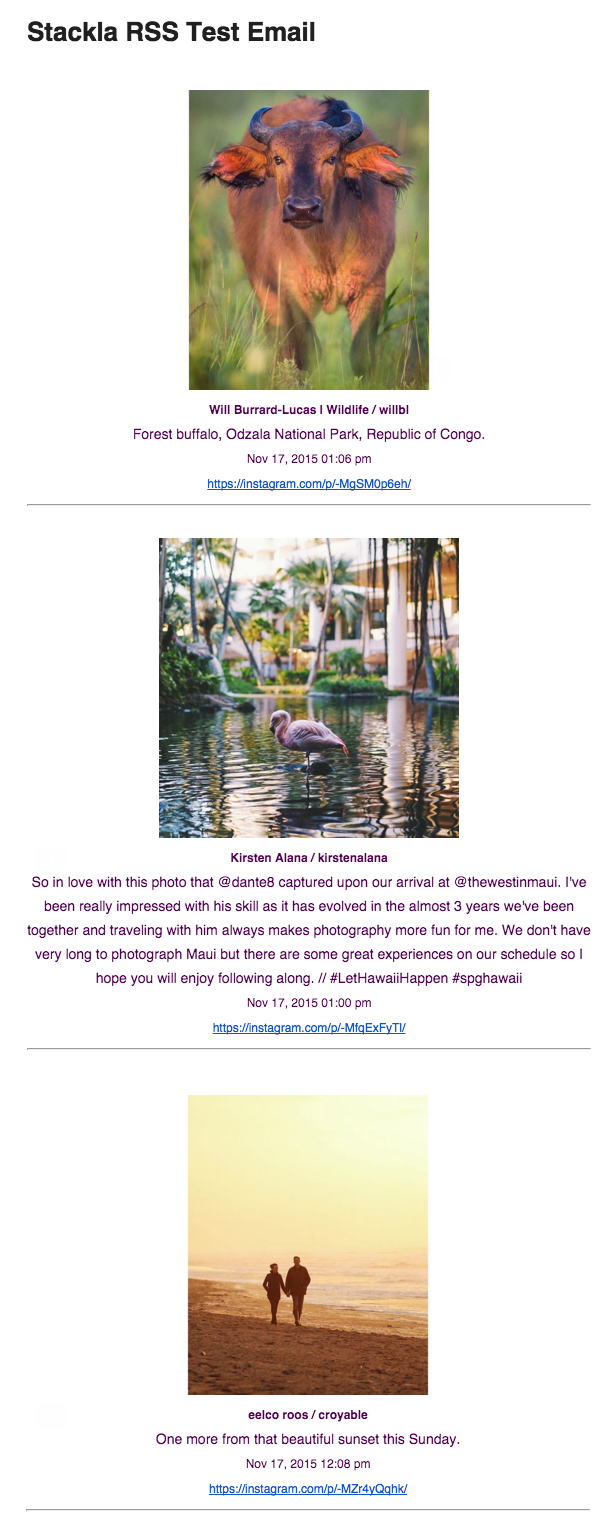
Once entered, we hit save to generate an email template like below:

Provided you are happy with the rest of the email look and feel you are right to send

Once you hit send, MailChimp and Nosto's UGC will handle the heavy lifting of taking the right UGC content and embedding it into the email. The end result is something similar to below
PreviousMailchimpNextWebhooks

Was this helpful?