Adding support for customer group pricing
In this article, you will learn how to implement multi-variants in Nosto. When the implementation is complete, you will be able to display different products at different prices to different customer groups.
Edge cases
If either of the following cases applies to you, we recommend either an API implementation or fetching the prices via the frontend API of your platform instead of sending the price variations to Nosto. Shopify for example has the Storefront API and our Shopware plugin has an endpoint for multi-currency that you can extend. Please reach out to our team or your Nosto onboarding manager for additional consultation.
You can only change the pricing and the availabilities using this feature.
You cannot use SKUs with this feature at the time of writing.
You cannot use Nosto multi currency with this feature.
Ideal use cases
You will need to implement the multi-variate tagging if you have any such scenarios:
Your store has different prices for B2B and B2C customers
Your store has different prices for logged-in and logged-out customers
Your store has different prices for loyalty customers
Your store has different prices and availabilities for different locations
Prior to the multi-variate implementation, ensure that the Nosto tagging is correctly in place. Some of the tagging must be slightly amended to support multi-variants.
Changes to the product tagging
The product page tagging must be amended to denote the primary variation code of the product.
For example, a retailer who has different prices for normal and loyal customers would have GENERAL as the default variation id and LOYAL as an extra variation.
or using DOM tagging
Ensure that a span element with the class variation_id is added as a child of the nosto_product element within the product page tagging.
Note: The code in the
variation_idelement must remain static, regardless of the current context. For example, if a loyal customer is logged in, thevariation_idfield would stillGENERALand not change.
What about the prices in the cart and the order tagging?
The cart and order tagging can be left as-is but the prices must be in the customer's currently active currency. For example, a customer shopping in Swiss Francs (CHF) should have all the cart items tagged in Swiss Francs (CHF). Failure to do so will result in incorrect prices in any triggered emails such as abandoned cart or order followup.
Specifying the active variation
Once you have amended the product tagging, an additional DIV element must be added to all the other pages (including the product page itself). The tag should not be encapsulated in the nosto_product DIV tag. The information sent in the tag refers to the segment of the customer.
or via DOM tagging
For example, on the site of a retailer, who has different prices for normal (GENERAL) and loyal (LOYAL) customers, if the customer is a logged in customer and is a known loyalty customer, the nosto_variation element should show LOYAL. If the customer logs out or a new customer visits, and there is no way to identify him as a loyal customer, the nosto_variation element should show GENERAL.
Integration with search/category merchandising (universal)
The search/category merchandising (universal) API supports specifying the variation ID in requests using the variationId property of the products object.
If specified, the selected variation's specific properties automatically replace the corresponding values in the top-level product. All features (e.g., merchandising rules, facets, filters, sorting) work with the selected variation's values automatically when the variation ID is provided.
For Nosto code editor integrations, please refer to a simplified version of this process.
Enabling multi-variants from the admin
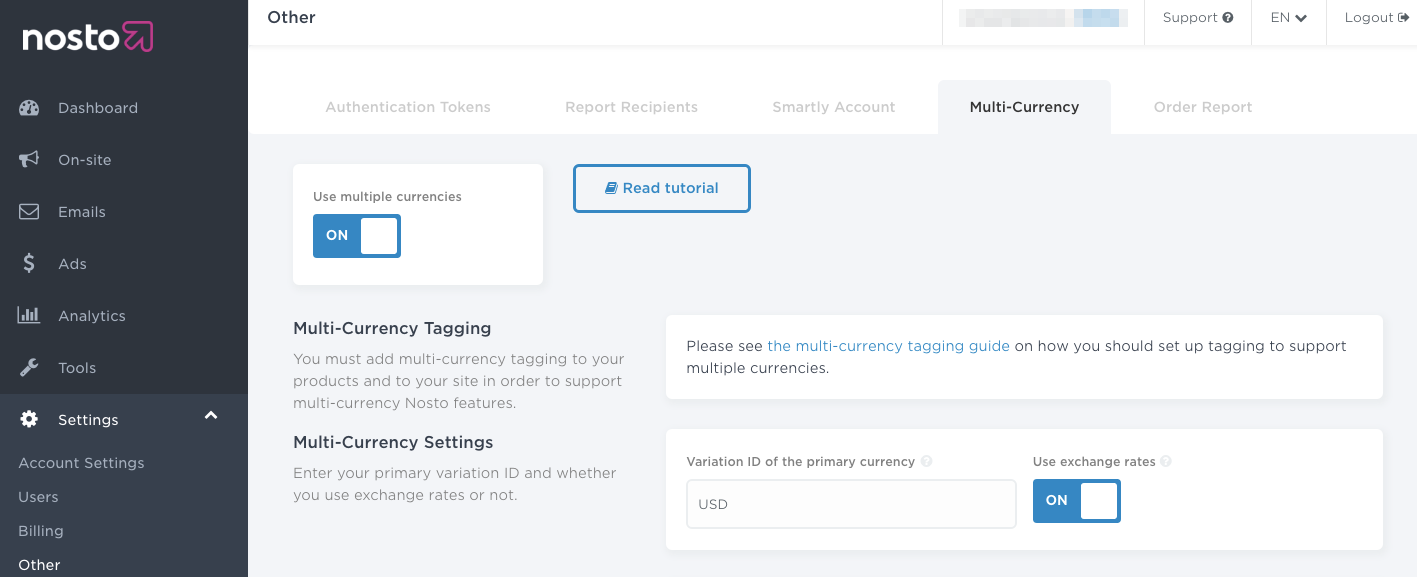
Once the tagging changes have been done and the API implemented, you need to configure and enable it from your admin panel under Settings > Other > Multi-Currency. Toggle the Use Multiple Currencies switch on and Use Exchange Rates switch off and set the variation ID of the primary currency via the input field and toggle on the exchange rates switch.

Note: Ensure that the Variation ID of the primary currency matches the value sent via the
variation_idelement in the product tagging.Note: Multi-variants cannot be used in conjunction with exchange-rates based multi-currency feature. You must keep the Use Exchange Rates switch off.
You will also need to configure the price formatting for your primary and secondary currencies.
Reviewing your changes
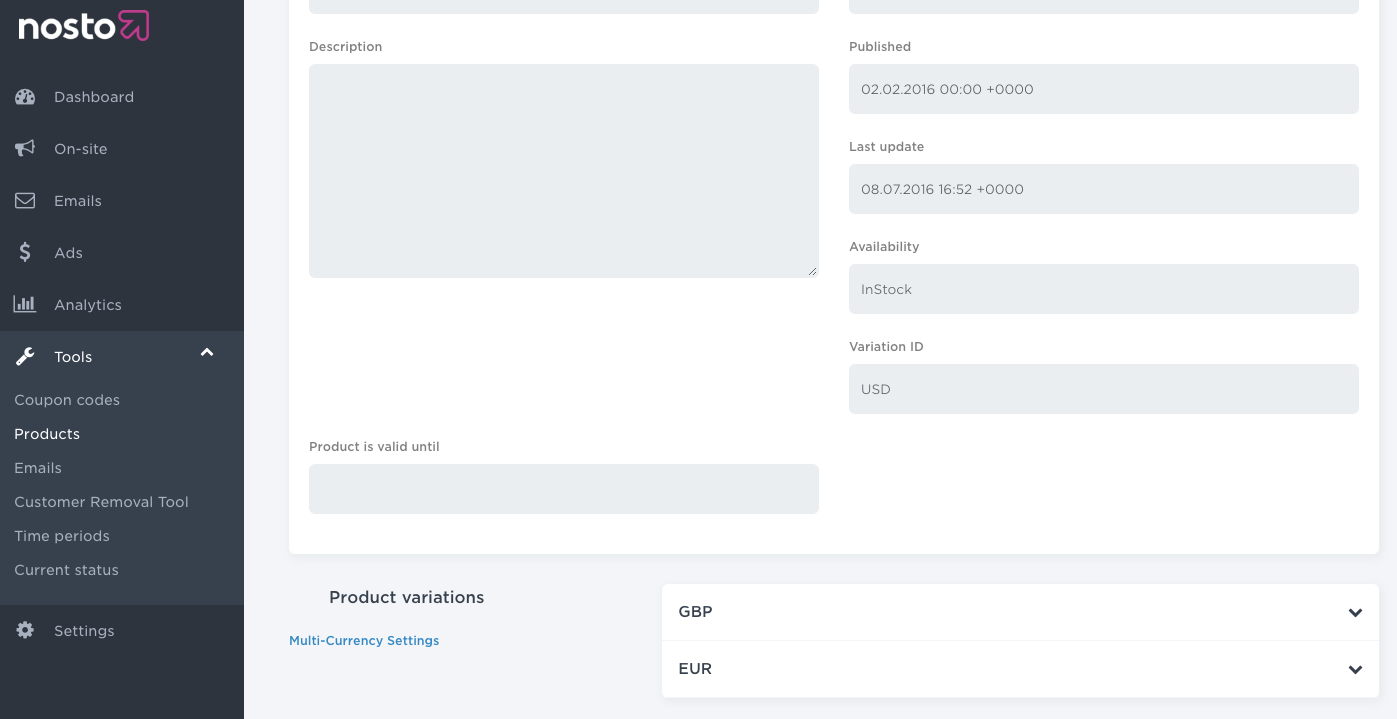
Once you enabled multi-variants you can preview the product prices for different groups by navigating to Tools > Products and choosing a product.
You will see one or more dropdowns that contain the prices and the availability for that group.

When you have reviewed your set-up, you’re all set and ready to go live with our features. Nosto will automatically handle the different customer groups across its feature set.
See also
To learn more about the api.setTaggingProvider usage, please refer to the official API documentation.
Last updated
Was this helpful?