Shopify
  • Personalization for Shopify
  • Installing
  • Tracking & Session Management
    • Standard Shopify Storefronts
    • Custom Storefronts (Hydrogen, Headless & more)
  • Shopify International (Markets)
    • Front End addition
  • Recommendation Extensions
  • Guides
    • Quicker loading times
    • Granting Access to your Store
    • Adding/Moving Recommendations
    • Customizing Product Metadata
    • How Nosto modifies your theme
    • Version Controlled Themes
    • Implementing enhanced conversion tracking
  • Features
    • Variations (Configurable Products)
    • Managing the Cart
    • Supplier Cost & Inventory Level
    • Restore Cart Link
    • Ratings & Reviews
    • Multi Currency Support
    • Shopify Flow
    • Shopify Hydrogen
    • Marketing permission and GDPR compatibility
    • Online Store 2.0
    • Shopify Sections
    • Dynamic Bundle Discounts
    • Customer Reference
  • Integrations
    • Using Yotpo
    • Using Stamped.IO
    • Using Judge.Me
    • Using Okendo
  • Articles
    • Article: Leveraging Margin Data
  • FAQ
  • Uninstalling
  • Visit Nosto
  • Issues
  • Releases
Powered by GitBook
On this page
  • Introduction
  • Enable sections feature
  • How it works
  • Add new placements

Was this helpful?

  1. Features

Shopify Sections

PreviousOnline Store 2.0NextDynamic Bundle Discounts

Last updated 1 year ago

Was this helpful?

Introduction

Nosto supports Shopify sections. You can add new placements through sections or drag-and-drop existing ones.

Our implementation for sections is limited only to Shopify Online Store 2.0. This is based on Shopify architecture.

Enable sections feature

To enable sections navigate to the Shopify Settings tab in your Nosto account, or Settings > Integrations > Shopify > Manage. You can find it easily under Dashboard > Go to Shopify Settings. On the settings page, navigate to the Settings tab click the enable button.

To add sections to existing themes with Nosto please remove Nosto from the theme and install again, or refresh theme.

How it works

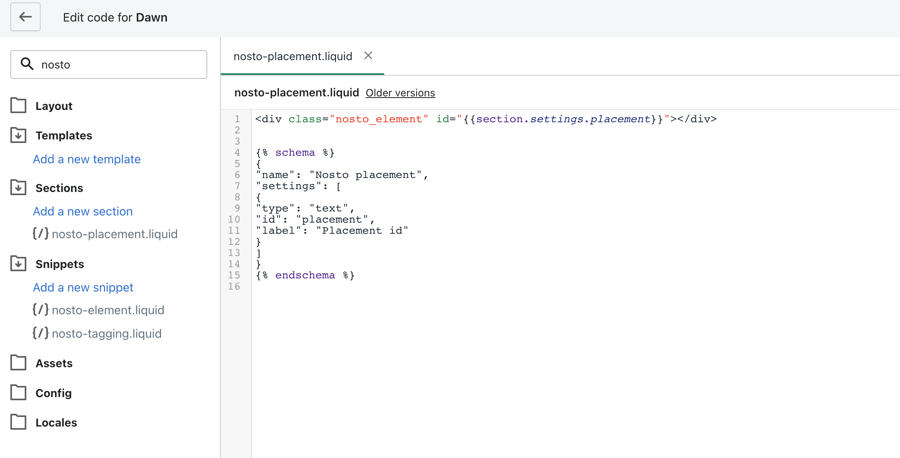
When enabled on Nosto's end, our app will create a new section under sections named nosto-placement.liquid. The default Nosto placements will be added on the template JSON file.

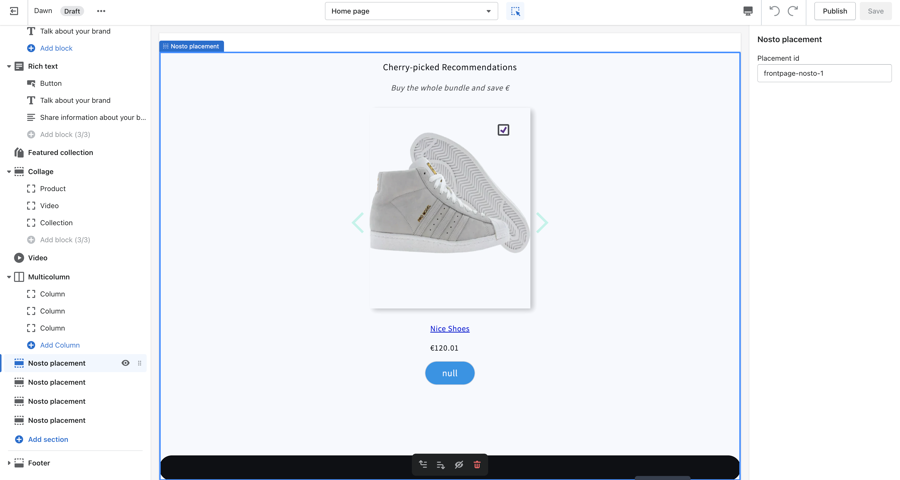
You can find the placements on the theme editor under the name of Nosto placement. The placement id is passed as a setting parameter.

Add new placements

You can add more placements to your theme based on the section. In case you are adding through the code editor, you need to pass the placement id under the settings object with key placement.

    "productpage-nosto-1": {
      "type": "nosto-placement",
      "settings": {
        "placement": "productpage-nosto-1"
      }
    }

Read more
Shopify sections
Introduction
How it works
Add new placement
image
image
image