Installing
PHP Requirements
The Nosto Magento extension requires at least PHP version 5.4.0 and it's also compatible with PHP >= 7.0.0
Installing the Extension
The preferred way of installing the extension is through the Magento Connect Manager. It can, however, also be installed as a local extension package or directly from the GitHub repository if needed.
For development purposes it is recommended to use the repository approach, as you can then easily keep track of any changes while having the extension installed in Magento.
Installing via Magento Connect
The preferred way of installing the extension is through Magento Connect.
Open the Magento Connect Manager from your Magento backend, and click the connect link under the "Install New Extensions" section
Search for the Nosto extension to find the Nosto extension page
Click the "Install Now" button and copy the install link
Go back to your Magento installation and paste the link into the text field under the "Install New Extensions" section and click "install"
Wait for the the installation to finish and go back to the Magento admin
Installing via a direct download (TGZ)
The extension package archive can be obtained from the projects releases page on GitHub.
Note: do NOT download the "source code" as that will not include the needed dependencies for the extension, instead use the "Nosto_Tagging-x.x.x.tgz" archive.
Using Magento Connect Manager
The extension can also be installed as a local package by uploading the extension package archive manually in the Magento Connect Manager.
Using the command-line (CLI)
Once you have downloaded the TGZ file, use the mage CLI to install the package:
Installing via Modman
For development purposes, the plugin can be installed directly from the GitHub repository by cloning the project and using Modman.
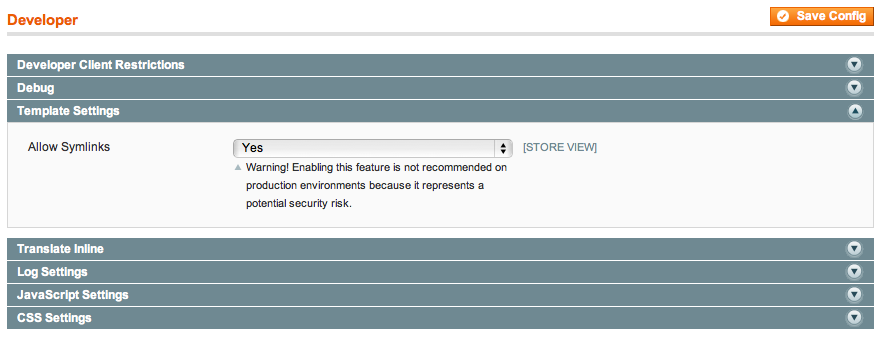
Prior to proceeding, Magento must be configured to allow-symlinks. Symlinks can be enabled by navigating to System >> Configuration >> Developer and choosing "Allow Symlinks".

Navigate to the Magento directory and initialize Modman. If you are already using Modman, you may omit this step.
Once Modman is initialized, a
.modmandirectory will be created. This is where all Modman managed extensions reside. Proceed to checking out the repository by running
You will see some errors about dependencies. Those dependencies will be fixed in the next steps.
The repository will checked out in a sub-directory of the
.modmanfolder. Navigate to thenosto-magentodirectory.
Nosto for Magento uses Composer managed project. For the extension to work, it's dependencies needs to be installed by using Composer.
Once the dependencies are installed, the autoloader must be dumped. An explanation of autoloader dumping is outside the scope of this article.
Once the autoloader has been dumped, the
libdirectory must be generated. This is done by using Pearify. A scrolling wall of text will ensue and alibdirectory will be generated.
The final step is to fix the Modman symlinks. Navigate back your Magento installation root directory begin the repair process by invoking:
That's it! You should now have Nosto extension installed into your Magento. The sources and the repo are located under .modman/nosto-magento and you can use it as any other git repository.
Last updated